Design Cookbook: Wheels
Cookbook Index
General Wheel Connections
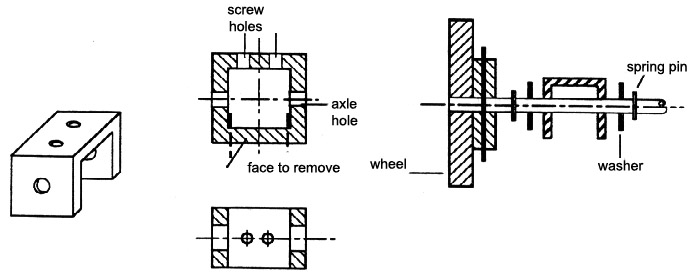
Free Wheel Brackets
This design can be used to hold free wheels inside a bracket
Materials:
Square extruded box section (1 inch or 25mm is generally a good size)
Procedure:
- Mark off two sections approximately 25mm long
- On one side, mark the center line. Drill two holes per section along the line. The drill bit size should be a clearance drill for the screw size you will use. Only go through one side. This side is now the tope side.
- On one of the two side adjacent to the top, mark the center with a vertical line. The axle hole will go on this line. The exact location of the hole on the line is determined by other elements of your design. For example, the height of the motor may determine the location if this shaft will be driven. To prevent your car from sloping, all four wheel mounts should be at the same location. Mark the spot and drill a hole through both sides. The drill bit sized should allow the shaft to spin freely or accomdate a bearing if you are using one.
- Separate the two brackets from the rest of the stock.
- Cut the side without holes off. Try to get as close to the inside edge as possible. The inside face should be flat. File down any metal that is sticking out.
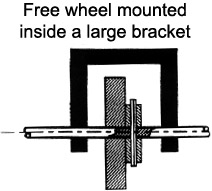
- If a larger box extrusion is used, than the free wheel can be mounted inside the bracked (balanced) rather than outside (cantilevered).