Process plans are critical for doing well in the design world! No matter how good your design is, unplanned manufacturing will result in a poor final product.
Process plans allow you to make the most of your time in the shop. They also help you to structure your thoughts by forcing you to think about how your are going to build your parts and machine before you enter the shop.
For a lot of enginers, this course will be your first long term structured design project. The format that your process plans should follow is described below.
You should make a table with the following columns. Make a row for each major step in making a part.
| Step | Tools Needed | Materials Needed | Description |
1 |
. | . | . |
2 |
. | . | . |
3 |
. | . | . |
Good drawings should contain all of your dimensional information. You should have at least one (for complex parts, more likely two or three) good dimensioned drawing for each table. The drawings should include the following:
| Step | Tools Needed | Materials Needed | Description |
1 |
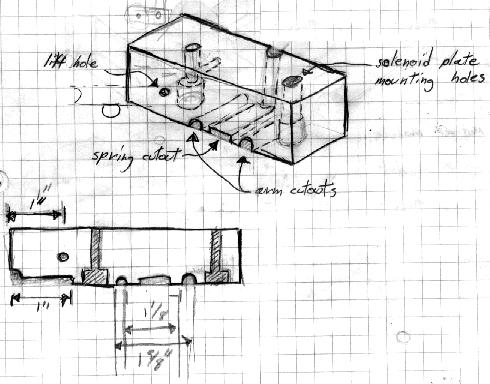
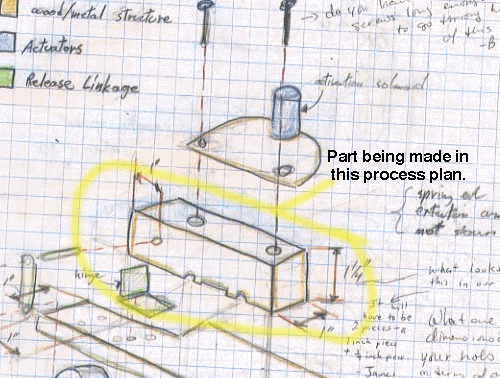
bandsaw, C-clamp | 1/2" and 1/4" basswood, wood glue | Cut 2 blocks from the 1/2" basswood and 1 block from the 1/4" bass to build the upper block showing in sketch 6.2c and 3.4c. Glue and clamp the three pieces together. |
2 |
bandsaw | part from step 1 | Cut the grooves shown in sketch 6.2c with the bandsaw. |
3 |
#32 drill | part from step 2 | Drill solenoid mounting holes and the lift hole. |
4 |
drill (larger) | part from step 3 | Counter bore solenoid mounting holes on underside of upper block to the head of the 4-40 screws fit. |