This tutorial demonstrates the basics of using Inkscape. This is a regular Inkscape document that you can view, edit, copy from, or save.
The Basic Tutorial covers canvas navigation, managing documents, shape tool basics, selection techniques, transforming objects with selector, grouping, setting fill and stroke, alignment, and z-order. For more advanced topics, check out the other tutorials in the Help menu.
Panning the canvas
There are many ways to pan (scroll) the document canvas. Try Ctrl+arrow keys to scroll by keyboard. (Try this now to scroll this document down.) You can also drag the canvas by the middle mouse button. Or, you can use the scrollbars (press Ctrl+B to show or hide them). The wheel on your mouse also works for scrolling vertically; press Shift with the wheel to scroll horizontally.
Zooming in or out
The easiest way to zoom is by pressing - and + (or =) keys. You can also use Ctrl+middle click or Ctrl+right click to zoom in, Shift+middle click or Shift+right click to zoom out, or rotate the mouse wheel with Ctrl. Or, you can click in the zoom entry field (in the bottom left corner of the document window), type a precise zoom value in %, and press Enter. We also have the Zoom tool (in the toolbar on left) which lets you to zoom into an area by dragging around it.
Inkscape also keeps a history of the zoom levels you've used in this work session. Press the ` key to go back to the previous zoom, or Shift+` to go forward.
Inkscape tools
The vertical toolbar on the left shows Inkscape's drawing and editing tools. In the top part of the window, below the menu, there's the Commands bar with general command buttons and the Tool Controls bar with controls that are specific to each tool. The status bar at the bottom of the window will display useful hints and messages as you work.
Many operations are available through keyboard shortcuts. Open Help > Keys and Mouse to see the complete reference.
Creating and managing documents
To create a new empty document, use or press Ctrl+N. To open an existing SVG document, use (Ctrl+O). To save, use (Ctrl+S), or (Shift+Ctrl+S) to save under a new name. (Inkscape may still be unstable, so remember to save often!)
Inkscape uses the SVG (Scalable Vector Graphics) format for its files. SVG is an open standard widely supported by graphic software. SVG files are based on XML and can be edited with any text or XML editor (apart from Inkscape, that is). Besides SVG, Inkscape can import and export several other formats (EPS, PNG).
Inkscape opens a separate document window for each document. You can navigate among them using your window manager (e.g. by Alt+Tab), or you can use the Inkscape shortcut, Ctrl+Tab, which will cycle through all open document windows. (Create a new document now and switch between it and this document for practice.)
Creating shapes
Time for some nice shapes! Click on the Rectangle tool in the toolbar (or press F4) and click-and-drag, either in a new empty document or right here:

As you can see, default rectangles come up blue, with a black stroke (outline), and partly transparent. We'll see how to change that below. With other tools, you can also create ellipses, stars, and spirals:

These tools are collectively known as shape tools. Each shape you create displays one or more diamond-shaped handles; try dragging them to see how the shape responds. The Controls panel for a shape tool is another way to tweak a shape; these controls affect the currently selected shapes (i.e. those that display the handles) and set the default that will apply to newly created shapes.
To undo your last action, press Ctrl+Z. (Or, if you change your mind again, you can redo the undone action by Shift+Ctrl+Z.)
Moving, scaling, rotating
The most frequently used Inkscape tool is the Selector. Click the topmost button (with the arrow) on the toolbar, or press F1 or Space. Now you can select any object on the canvas. Click on the rectangle below.

You will see eight arrow-shaped handles appear around the object. Now you can:
-
Move the object by dragging it. (Press Ctrl to restrict movement to horizontal and vertical.)
-
Scale the object by dragging any handle. (Press Ctrl to preserve the original height/width ratio.)
Now click the rectangle again. The handles change. Now you can:
-
Rotate the object by dragging corner handles. (Press Ctrl to restrict rotation to 15 degree steps. Drag the cross mark to position the center of rotation.)
-
Skew (shear) the object by dragging non-corner handles. (Press Ctrl to restrict skewing to 15 degree steps.)
While in Selector, you can also use the numeric entry fields in the Controls bar (above the canvas) to set exact values for coordinates (X and Y) and size (W and H) of the selection.
Transforming by keys
One of Inkscape's features that set it apart from most other vector editors is its emphasis on keyboard accessibility. There's hardly any command or action that is impossible to do from keyboard, and transforming objects is no exception.
You can use the keyboard to move (arrow keys), scale (< and > keys), and rotate ([ and ] keys) objects. Default moves and scales are by 2 px; with Shift, you move or scale by 10 times that. Ctrl+> and Ctrl+< scale up or down to 200% or 50% of the original, respectively. Default rotates are by 15 degrees; with Ctrl, you rotate by 90 degrees.
However, perhaps the most useful are pixel-size transformations, invoked by using Alt with the transform keys. For example, Alt+arrows will move the selection by 1 pixel at the current zoom (i.e. by 1 screen pixel, not to be confused with the px unit which is an SVG length unit independent of zoom). This means that if you zoom in, one Alt+arrow will result in a smaller absolute movement which will still look like one-pixel nudge on your screen. It is thus possible to position objects with arbitrary precision simply by zooming in or out as needed.
Similarly, Alt+> and Alt+< scale selection so that its visible size changes by one screen pixel, and Alt+[ and Alt+] rotate it so that its farthest-from-center point moves by one screen pixel.
Multiple selections
You can select any number of objects simultaneously by Shift+clicking them. Or, you can drag around the objects you need to select; this is called rubberband selection. (Selector creates rubberband when dragging from an empty space; however, if you press Shift before starting to drag, Inkscape will always create the rubberband.) Practice by selecting all three of the shapes below:

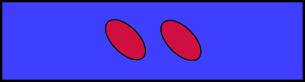
Now, use rubberband (by drag or Shift+drag) to select the two ellipses but not the rectangle:
Each individual object within a selection displays a selection cue — by default, a dashed rectangular frame. These cues make it easy to see at once what is selected and what is not. For example, if you select both the two ellipses and the rectangle, without the cues you would have hard time guessing whether the ellipses are selected or not.
Shift+clicking on a selected object excludes it from the selection. Select all three objects above, then use Shift+click to exclude both ellipses from the selection leaving only the rectangle selected.
Pressing Esc deselects any selected objects. Ctrl+A selects all objects in the current layer (if you did not create layers, this is the same as all objects in the document).
Grouping
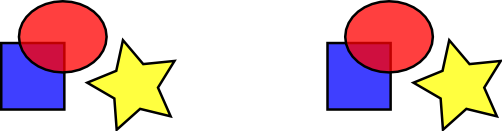
Several objects can be combined into a group. A group behaves as a single object when you drag or transform it. Below, the three objects on the left are independent; the same three objects on the right are grouped. Try to drag the group.
To create a group, you select one or more objects and press Ctrl+G. To ungroup one or more groups, select them and press Ctrl+U. Groups themselves may be grouped, just like any other objects; such recursive groups may go down to arbitrary depth. However, Ctrl+U only ungroups the topmost level of grouping in a selection; you'll need to press Ctrl+U repeatedly if you want to completely ungroup a deep group-in-group.
You don't necessarily have to ungroup, however, if you want to edit an object within a group. Just Ctrl+click that object and it will be selected and editable alone, or Shift+Ctrl+click several objects (inside or outside any groups) for multiple selection regardless of grouping. Try to move or transform the individual shapes in the group (above right) without ungrouping it, then deselect and select the group normally to see that it still remains grouped.
Fill and stroke
Many of Inkscape's functions are available via dialogs. Probably the simplest way to paint an object some color is to open the Swatches dialog from the Objects menu, select an object, and click a swatch to paint it (change its fill color).
More powerful is the Fill and Stroke dialog (Shift+Ctrl+F). Select the shape below and open the Fill and Stroke dialog.
You will see that the dialog has three tabs: Fill, Stroke paint, and Stroke style. The Fill tab lets you edit the fill (interior) of the selected object(s). Using the buttons just below the tab, you can select types of fill, including no fill (the button with the X), flat color fill, as well as linear or radial gradients. For the above shape, the flat fill button will be activated.
Further below, you see a collection of color pickers, each in its own tab: RGB, CMYK, HSL, and Wheel. Perhaps the most convenient is the Wheel picker, where you can rotate the triangle to choose a hue on the wheel, and then select a shade of that hue within the triangle. All color pickers contain a slider to set the alpha (opacity) of the selected object(s).
Whenever you select an object, the color picker is updated to display its current fill and stroke (for multiple selected objects, the dialog shows their average color). Play with these samples or create your own:

Using the Stroke paint tab, you can remove the stroke (outline) of the object, or assign any color or transparency to it:

The last tab, Stroke style, lets you set the width and other parameters of the stroke:

Finally, instead of flat color, you can use gradients for fills and/or strokes:

When you switch from flat color to gradient, the newly created gradient uses the previous flat color, going from opaque to transparent. Switch to the Gradient tool (Ctrl+F1) to drag the gradient handles — the controls connected by lines that define the direction and length of the gradient. When any of the gradient handles is selected (highlighted blue), the Fill and Stroke dialog sets the color of that handle instead of the color of the entire selected object.
Yet another convenient way to change a color of an object is by using the Dropper tool (F7). Just click anywhere in the drawing with that tool, and the picked color will be assigned to the selected object's fill (Shift+click will assign stroke color).
Duplication, alignment, distribution
One of the most common operations is duplicating an object (Ctrl+D). The duplicate is placed exactly above the original and is selected, so you can drag it away by mouse or by arrow keys. For practice, try to fill the line with copies of this black square:

Chances are, your copies of the square are placed more or less randomly. This is where the Align dialog (Ctrl+Shift+A) is useful. Select all the squares (Shift+click or drag a rubberband), open the dialog and press the "Center on horizontal axis" button, then the "Make horizontal gaps between objects equal" button (read the button tooltips). The objects are now neatly aligned and distributed equispacedly. Here are some other alignment and distribution examples:

Z-order
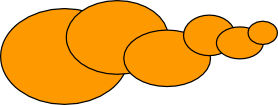
The term z-order refers to the stacking order of objects in a drawing, i.e. to which objects are on top and obscure others. The two commands in the Object menu, Raise to Top (the Home key) and Lower to Bottom (the End key), will move your selected objects to the very top or very bottom of the current layer's z-order. Two more commands, Raise (PgUp) and Lower (PgDn), will sink or emerge the selection one step only, i.e. move it past one non-selected object in z-order (only objects that overlap the selection count; if nothing overlaps the selection, Raise and Lower move it all the way to the top or bottom correspondingly).
Practice using these commands by reversing the z-order of the objects below, so that the leftmost ellipse is on top and the rightmost one is at the bottom:
A very useful selection shortcut is the Tab key. If nothing is selected, it selects the bottommost object; otherwise it selects the object above the selected object(s) in z-order. Shift+Tab works in reverse, starting from the topmost object and proceeding downwards. Since the objects you create are added to the top of the stack, pressing Shift+Tab with nothing selected will conveniently select the object you created last. Practice the Tab and Shift+Tab keys on the stack of ellipses above.
Selecting under and dragging selected
What to do if the object you need is hidden behind another object? You may still see the bottom object if the top one is (partially) transparent, but clicking on it will select the top object, not the one you need.
This is what Alt+click is for. First Alt+click selects the top object just like the regular click. However, the next Alt+click at the same point will select the object below the top one; the next one, the object still lower, etc. Thus, several Alt+clicks in a row will cycle, top-to-bottom, through the entire z-order stack of objects at the click point. When the bottom object is reached, next Alt+click will, naturally, again select the topmost object.
This is nice, but once you selected an under-the-surface object, what can you do with it? You can use keys to transform it, and you can drag the selection handles. However, dragging the object itself will reset the selection to the top object again (this is how click-and-drag is designed to work — it selects the (top) object under cursor first, then drags the selection). To tell Inkscape to drag what is selected now without selecting anything else, use Alt+drag. This will move the current selection no matter where you drag your mouse.
Practice Alt+click and Alt+drag on the two brown shapes under the green transparent rectangle:

Conclusion
This concludes the Basic tutorial. There's much more than that to Inkscape, but with the techniques described here, you will already be able to create simple yet useful graphics. For more complicated stuff, go through the Advanced and other tutorials in .