This tutorial covers the four shape tools: Rectangle, Ellipse, Star, and Spiral. We will demonstrate the capabilities of Inkscape shapes and show examples of how and when they could be used.
Use Ctrl+Arrows, mousewheel, or middle button drag to scroll the page down. For basics of object creation, selection, and transformation, see the Basic tutorial in .
Inkscape has four versatile shape tools, each tool capable of creating and editing its own type of shapes. A shape is an object which you can modify in ways unique to this shape type, using draggable handles and numeric parameters that determine the shape's appearance.
For example, with a star you can alter the number of tips, their length, angle, rounding, etc. ‚€” but a star remains a star. A shape is "less free" than a simple path, but it's often more interesting and useful. You can always convert a shape to a path (Ctrl+Shift+C), but the reverse conversion is not possible.
The shape tools are Rectangle, Ellipse, Star, and Spiral. First, let's look at how shape tools work in general; then we'll explore each shape type in detail.
General tips
A new shape is created by dragging on canvas with the corresponding tool. Once the shape is created (and so long as it is selected), it displays its handles as white diamond-shaped marks, so you can immediately edit what you created by dragging these handles.
All four kinds of shapes display their handles in all four shape tools as well as in the Node tool (F2). When you hover your mouse over a handle, it tells you in the statusbar what this handle will do when dragged or clicked with different modifiers.
Also, each shape tool displays its parameters in the Tool Controls bar (which runs horizontally above the canvas). Usually it has a few numeric entry fields and a button to reset the values to defaults. When shape(s) of the current tool's native type are selected, editing the values in the Controls bar changes the selected shape(s).
Any changes made to the Tool Controls are remembered and used for the next object you draw with that tool. For example, after you change the number of tips of a star, new stars will have this number of tips as well when drawn. Moreover, even simply selecting a shape sends its parameters to the Tool Controls bar and thus sets the values for newly created shapes of this type.
When in a shape tool, selecting an object can be done by clicking on it. Ctrl+click (select in group) and Alt+Click (select under) also work as they do in Selector tool. Esc deselects.
Rectangles
A rectangle is the simplest but perhaps the most common shape in design and illustration. Inkscape attempts to make creating and editing rectangles as easy and convenient as possible.
Switch to the Rectangle tool by F4 or by clicking its toolbar button. Draw a new rectangle alongside this blue one:

Then, without leaving the Rectangle tool, switch selection from one rectangle to the other by clicking on them.
Rectangle drawing shortcuts:
-
With Ctrl, draw a square or an integer-ratio (2:1, 3:1, etc) rectangle.
-
With Shift, draw around the starting point as center.
As you see, the selected rectangle (the just-drawn rectangle is always selected) shows three handles in three of its corners. In fact, these are four handles, but two of them (in the top right corner) overlap if the rectangle is not rounded. These two are the rounding handles; the other two (top left and bottom right) are resize handles.
Let's look at the rounding handles first. Grab one of them and drag down. All four corners of the rectangle become rounded, and you can now see the second rounding handle ‚€” it stays in the original position in the corner. If you want circular rounded corners, that is all you need to do. If you want corners which are rounded farther along one side than along the other, you can move that other handle leftwards.
Here, the first two rectangles have circular rounded corners, and the other two have elliptic rounded corners:

Still in the Rectangle tool, click on these rectangles to select, and observe their rounding handles.
Often, the radius and shape of the rounded corners must be constant within the entire composition, even if the sizes of the rectangles are different (think diagrams with rounded boxes of various sizes). Inkscape makes this easy. Switch to the Selector tool; in its Tool Controls bar, there's a group of four toggle buttons, the second from the left showing two concentric rounded corners. This is how you control whether the rounded corners are scaled when the rectangle is scaled or not.
For example, here the original red rectangle is duplicated and scaled several times, up and down, to different proportions, with the "Scale rounded corners" button off:

Note how the size and shape of the rounded corners is the same in all rectangles, so that the roundings align exactly in the top right corner where they all meet. All the dotted blue rectangles are obtained from the original red rectangle just by scaling in Selector, without any manual readjustment of the rounding handles.
For a comparison, here is the same composition but now created with the "Scale rounded corners" button on:
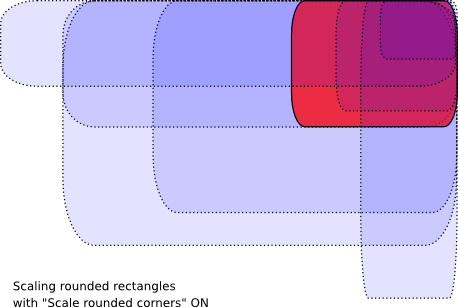
Now the rounded corners are as different as the rectangles they belong to, and there isn't a slightest agreement in the top right corner (zoom in to see). This is the same (visible) result as you would get by converting the original rectangle to a path (Ctrl+Shift+C) and scaling it as path.
Here are the shortcuts for the rounding handles of a rectangle:
-
Drag with Ctrl to make the other radius the same (circular rounding).
-
Ctrl+click to make the other radius the same without dragging.
-
Shift+click to remove rounding.
You may have noticed that the Rectangle tool's Controls bar shows the horizontal (Rx) and vertical (Ry) rounding radii for the selected rectangle and lets you set them precisely using any length units. The button does what is says ‚€” removes rounding from the selected rectangle(s).
An important advantage of these controls is that they can affect many rectangles at once. For example, if you want to change all rectangles in the layer, just do Ctrl+A () and set the parameters you need in the Controls bar. If any non-rectangles are selected, they will be ignored ‚€” only rectangles will be changed.
Now let's look at the resize handles of a rectangle. You might wonder, why do we need them at all, if we can just as well resize the rectangle with Selector?
The problem with Selector is that its notion of horizontal and vertical is always that of the document page. By contrast, a rectangle's resize handles scale it along that rectangle's sides, even if the rectangle is rotated or skewed. For example, try to resize this rectangle first with Selector and then with its resize handles in Rectangle tool:

Since the resize handles are two, you can resize the rectangle into any direction or even move it along its sides. Resize handles always preserve the rounding radii.
Here are the shortcuts for the resize handles:
-
Drag with Ctrl to snap to the sides or the diagonal of the rectangle. In other words, Ctrl preserves either width, or height, or the width/height ratio of the rectangle (again, in its own coordinate system which may be rotated or skewed).
Here is the same rectangle, with the gray dotted lines showing the directions to which the resize handles stick when dragged with Ctrl (try it):
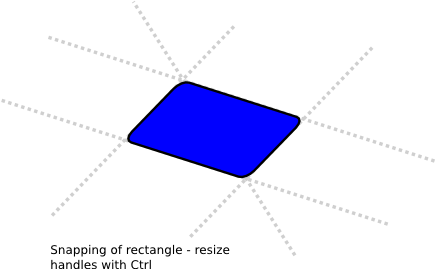
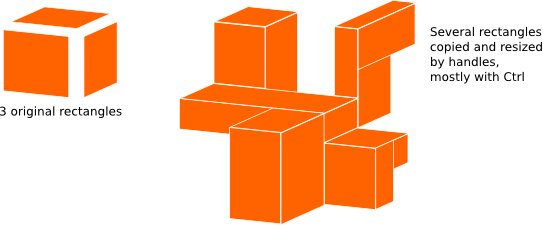
By slanting and rotating a rectangle, then duplicating it and resizing with its resize handles, 3D compositions can be created easily:
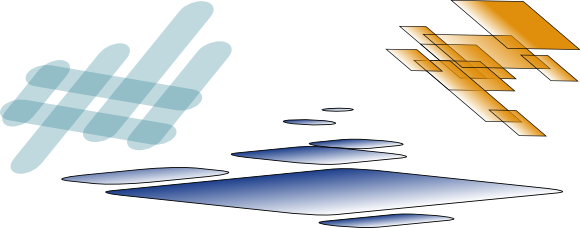
Here are some more examples of rectangle compositions, including rounding and gradient fills:
Ellipses
The Ellipse tool (F5) can create ellipses and circles, which you can turn into segments or arcs. The drawing shortcuts are the same as those of the rectangle tool:
-
With Ctrl, draw a circle or an integer-ratio (2:1, 3:1, etc.) ellipse.
-
With Shift, draw around the starting point as center.
Let's explore the handles of an ellipse. Select this one:
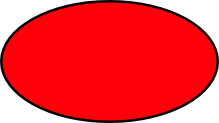
Once again, you see three handles initially, but in fact they are four. The rightmost handle is two overlapping handles that let you "open" the ellipse. Drag that rightmost handle, then drag the other handle which becomes visible under it, to get a variety of pie-chart segments or arcs:

To get a segment (an arc plus two radii), drag outside the ellipse; to get an arc, drag inside it. Above, there are 4 segments on the left and 3 arcs on the right. Note that arcs are unclosed shapes, i.e. the stroke only goes along the ellipse but does not connect the ends of the arc. You can make this obvious if you remove the fill, leaving only stroke:
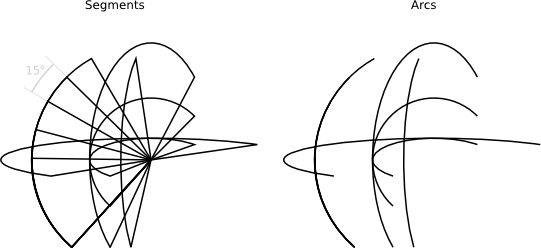
Note the fan-like group of narrow segments on the left. It was easy to create using angle snapping of the handle with Ctrl. Here are the arc/segment handle shortcuts:
-
With Ctrl, snap the handle every 15 degrees when dragging.
-
Shift+click to make the ellipse whole (not arc or segment).
The snap angle can be changed in Inkscape Preferences (the tab).
The other two handles of the ellipse are used for resizing it around its center. Their shortcuts are similar to those of the rounding handles of a rectangle:
-
Drag with Ctrl to make a circle (make the other radius the same).
-
Ctrl+click to make a circle without dragging.
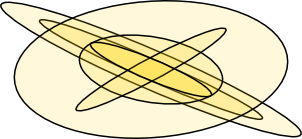
And, like the rectangle resize handles, these ellipse handles adjust the height and width of the ellipse in the ellipse's own coordinates. This means that a rotated or skewed ellipse can easily be stretched or squeezed along its original axes while remaining rotated or skewed. Try to resize any of these ellipses by their resize handles:
Stars
Stars are the most complex and the most exciting Inkscape shape. If you want to wow your friends by Inkscape, let them play with the Star tool. It's endlessly entertaining ‚€” outright addictive!
The Star tool can create two similar but distinct kinds of objects: stars and polygons. A star has two handles whose positions define the length and shape of its tips; a polygon has just one handle which simply rotates and resizes the polygon when dragged:
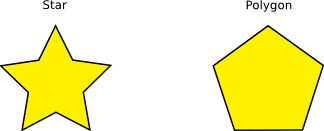
In the Controls bar of the Star tool, first comes a checkbox to turn a star into the corresponding polygon and back. Next, a numeric field sets the number of vertices of a star or polygon. This parameter is only editable via the Controls bar. The allowed range is from 3 (obviously) to 1024, but you shouldn't try large numbers (say, over 200) if your computer is slow.
When drawing a new star or polygon,
-
Drag with Ctrl to snap the angle to 15 degree increments.
Naturally, a star is a much more interesting shape (though polygons are often more useful in practice). The two handles of a star have slightly different functions. The first handle (initially it is on a vertex, i.e. on a convex corner of the star) makes the star rays longer or shorter, but when you rotate it (relative to the center of the shape), the other handle rotates accordingly. This means you cannot skew the star's rays with this handle.
The other handle (initially in a concave corner between two vertices) is, conversely, free to move both radially and tangentially, without affecting the vertex handle. (In fact, this handle can itself become vertex by moving farther from the center than the other handle.) This is the handle that can skew the star's tips to get all sorts of crystals, mandalas, snowflakes, and porcupines:
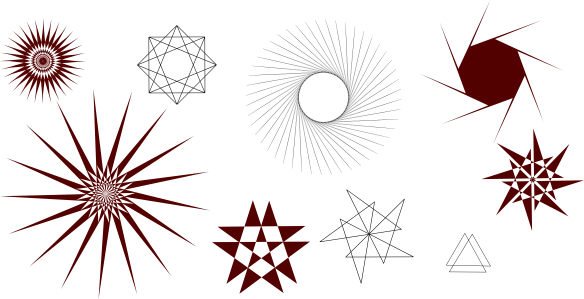
If you want just a plain regular star without any such lacework, you can make the skewing handle behave as the non-skewing one:
-
Drag with Ctrl to keep the star rays strictly radial (no skew).
-
Ctrl+click to remove the skew without dragging.
As a useful complement for the on-canvas handle dragging, the Controls bar has the field which defines the ratio of the two handles' distances to the center.
Inkscape stars have two more tricks in their bag. In geometry, a polygon is a shape with straight line edges and sharp corners. In the real world, however, various degrees of curvilinearity and roundedness are normally present ‚€” and Inkscape can do that too. Rounding a star or polygon works a bit differently from rounding a rectangle, however. You don't use a dedicated handle for this, but
-
Shift+drag a handle tangentially to round the star or polygon.
-
Shift+click a handle to remove rounding.
"Tangentially" means in a direction perpendicular to the direction to the center. If you "rotate" a handle with Shift counterclockwise around the center, you get positive roundedness; with clockwise rotation, you get negative roundedness. (See below for examples of negative roundedness.)
Here's a comparison of a rounded square (Rectangle tool) with a rounded 4-sided polygon (Star tool):
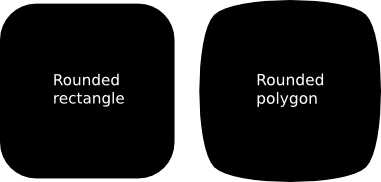
As you can see, while a rounded rectangle has straight line segments in its sides and circular (generally, elliptic) roundings, a rounded polygon or star has no straight lines at all; its curvature varies smoothly from the maximum (in the corners) to the minimum (mid-way between the corners). Inkscape does this simply by adding collinear Bezier tangents to each node of the shape (you can see them if you convert the shape to path and examine it in Node tool).
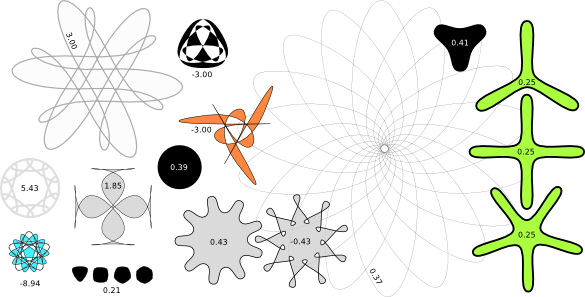
The parameter which you can adjust in the Controls bar is the ratio of the length of these tangents to the length of the polygon/star sides to which they are adjacent. This parameter can be negative, which reverses the direction of tangents. The values of about 0.2 to 0.4 give "normal" rounding of the kind you would expect; other values tend to produce beautiful, intricate, and totally unpredictable patterns. A star with a large roundedness value may reach far beyond the positions of its handles. Here are a few examples, each indicating its roundedness value:
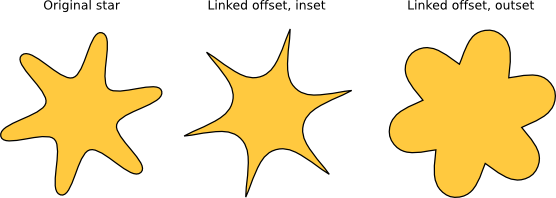
If you want the tips of a star to be sharp but the concaves smooth or vice versa, this is easy to do by creating an offset (Ctrl+J) from the star:
Shift+dragging star handles in Inkscape is one of the finest pursuits known to man. But it can get better still.
To closer imitate real world shapes, Inkscape can randomize (i.e. randomly distort) its stars and polygons. Slight randomization makes a star less regular, more humane, often funny; strong randomization is an exciting way to obtain a variety of crazily unpredictable shapes. A rounded star remains smoothly rounded when randomized. Here are the shortcuts:
-
Alt+drag a handle tangentially to randomize the star or polygon.
-
Alt+click a handle to remove randomization.
As you draw or handle-drag-edit a randomized star, it will "tremble" because each unique position of its handles corresponds to its own unique randomization. So, moving a handle without Alt re-randomizes the shape at the same randomization level, while Alt-dragging it keeps the same randomization but adjusts its level. Here are stars whose parameters are exactly the same, but each one is re-randomized by very slightly moving its handle (randomization level is 0.1 throughout):

And here is the middle star from the previous row, with the randomization level varying from -0.2 to 0.2:

Alt+drag a handle of the middle star in this row and observe as it morphs into its neighbors on the right and left ‚€” and beyond.
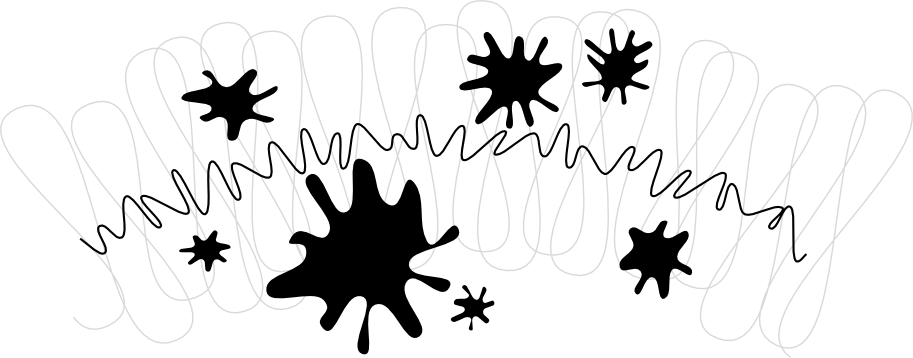
You will probably find your own applications for randomized stars, but I am especially fond of rounded amoeba-like blotches and large roughened planets with fantastic landscapes:
Spirals
Inkscape's spiral is a versatile shape, and though not as immersing as the star, it is sometimes very useful. A spiral, like a star, is drawn from the center; while drawing as well as while editing,
-
Ctrl+drag to snap angle to 15 degree increments.
Once drawn, a spiral has two handles at its inner and outer ends. Both handles, when simply dragged, roll or unroll the spiral (i.e. "continue" it, changing the number of turns). Other shortcuts:
Outer handle:
-
Shift+drag to scale/rotate around center (no rolling/unrolling).
-
Alt+drag to lock radius while rolling/unrolling.
Inner handle:
-
Alt+drag vertically to converge/diverge.
-
Alt+click to reset divergence.
-
Shift+click to move the inner handle to the center.
The divergence of a spiral is the measure of nonlinearity of its winds. When it is equal to 1, the spiral is uniform; when it is less than 1 (Alt+drag upwards), the spiral is denser on the periphery; when it is greater than 1 (Alt+drag downwards), the spiral is denser towards the center:

The maximum number of spiral turns is 1024.
Just as the Ellipse tool is good not only for ellipses but also for arcs (lines of constant curvature), the Spiral tool is useful for making curves of smoothly varying curvature. Compared to a plain Bezier curve, an arc or a spiral is often more convenient because you can make it shorter or longer by dragging a handle along the curve without affecting its shape. Also, while a spiral is normally drawn without fill, you can add fill and remove stroke for interesting effects.
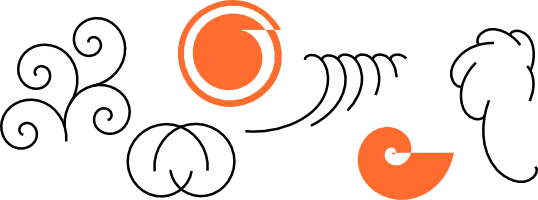
Especially interesting are spirals with dotted stroke ‚€” they combine the smooth concentration of the shape with regular equispaced marks (dots or dashes) for beautiful moire effects:

Conclusion
Inkscape's shape tools are very powerful. Learn their tricks and play with them at your leisure ‚€” this will pay off when you do your design work, because using shapes instead of simple paths often makes vector art faster to create and easier to modify. If you have any ideas for further shape improvements, please contact the developers.