


Changing your Computer's BIOS to Load from an Optical (CD/DVD) Drive
This section describes how you can change your computer's settings so that the computer starts directly from an optical drive. The menu of options and settings that is used to do this is often called the "BIOS Setup".
Please be careful when changing the BIOS settings. If you change your computer's startup-sequence incorrectly so that it does not check your hard disk, then you will not be able to start your computer normally until you have returned the settings to something sensible.
Why is changing the BIOS Setup Useful?
The easiest way to load the MDP Resource CD is to start your computer using a floppy disk (if your computer has a floppy disk drive). Most computers are already set up to automatically start from a floppy disk if one is inserted, so no change to the BIOS setup is usually necessary.
On nearly all computers, it is also possible to start directly from the CD without using a floppy disk at all. As well as being more convenient, this will load more quickly since it is faster to load programs from a CD-ROM than from a floppy disk. However, you may need to change some settings on your computer's BIOS Setup to ensure that the CD-ROM drive is checked before starting from a hard disk.
General Instructions
How the BIOS Setup is changed varies considerably from computer to computer, but the procedure for some models of PC is described below. Over time, more instructions will be added for other makes of computer.
In general, you can often enter the BIOS Setup by pressing one of the function keys or Delete or Esc just after the computer has turned on or been reset. This will present you with a series of menus, which can be navigated by using the arrow keys. You now need to find out where the startup-sequence is specified. This is often referred to as the "Boot Sequence" or the "Boot Options". You will want to change the setup so that the CD-ROM is "booted" before the Hard Disk - often this involves re-ordering the options. An example order is given below:
- 1st Device: CD-ROM
- 2nd Device: Floppy Disk
- 3rd Device: Hard Disk
You should only need to change the BIOS setup once, and then the change will be saved permanently. This will allow you to start your computer from a CD if one is inserted, or else start your computer normally using the hard disk if no CD is inserted.
Instructions for Specific Computers
This list will hopefully become more comprehensive with time. If you have any corrections, or would like to submit instructions for a different PC, then please email mdp-support@eng.cam.ac.uk .
The following procedures typically set the boot sequence to be CD-ROM, followed by Floppy Disk, followed by Hard Disk. You may wish to change this slightly if, for example, you don't have a floppy disk drive or you have a USB drive connected.
| Manufacturer | Model | Instructions | Image |
|---|---|---|---|
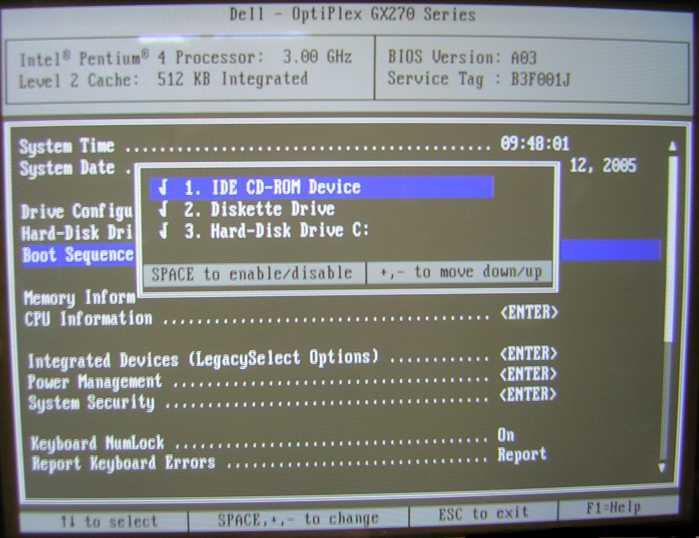
Dell | Optiplex GX270 (BIOS revision A03) |
|
|
Optiplex GX270 (BIOS revision A03) |
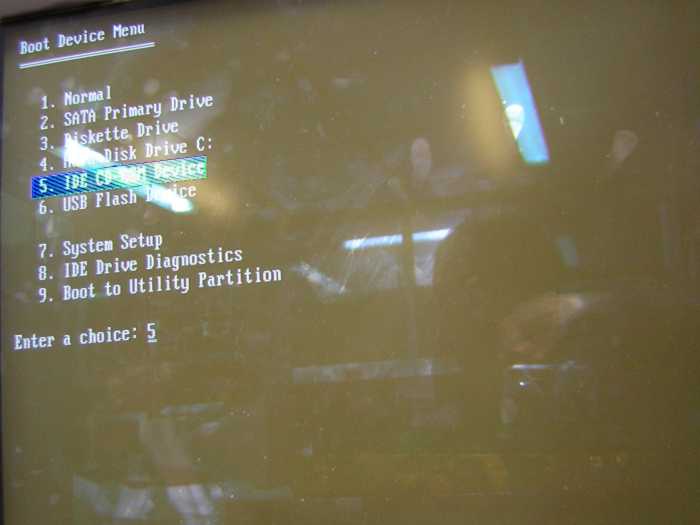
Or alternatively, to change the Boot Sequence but not change it permanently:
|
|
|
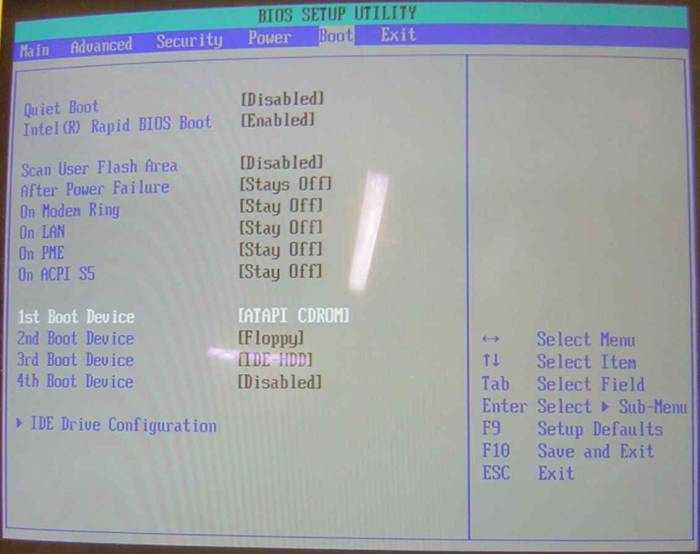
Intel |
??? unknown ??? |
|
|
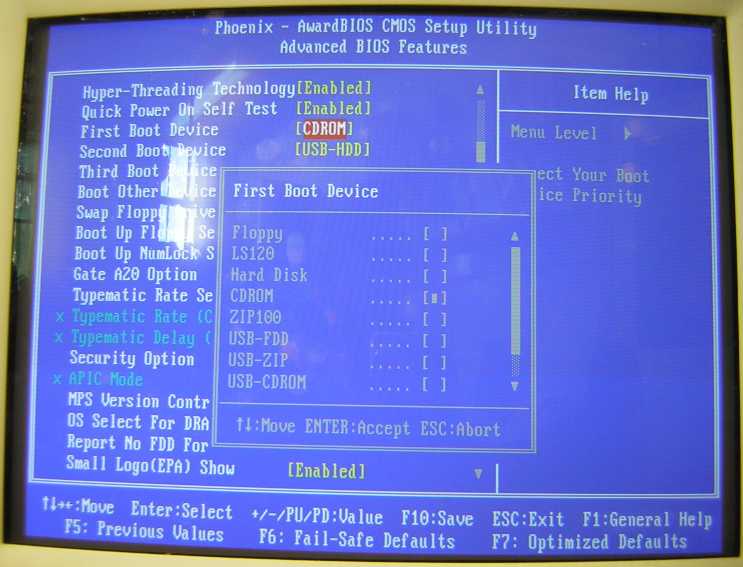
Shuttle |
Shuttlebox Phoenix AwardBIOS |
|
|